Cooking with Caroline – Winter 2023

Welcome back to Cooking with Caroline in the dreary month of February!

Anyone else tired of the cold and snow? Since there’s no produce actually in season in Minnesota right now and most produce is expensive, I find myself looking for ways to use canned goods and cheaper vegetables in wholesome and warm recipes. An inexpensive recipe that can simmer on the stove for a few hours? What better way to spend a cold dreary Sunday in February!

So, I bring you an inexpensive and simple recipe that can simmer on a dreary winter weekend day: Grandma Wilson’s Spaghetti. 

Mom didn’t make this a ton when we were kids, but I remember it always being a treat. You simply set the sauce to simmer and come back later to add the meat and vegetables. I promise it’s better than any jar of spaghetti sauce and it’s worth doubling for a few days of leftovers or if you’re feeding a large family.

  • Sauce:
    • One large can diced tomatoes (28 oz)
    • One can tomato paste (6 oz)
    • 6 oz of water
    • ½ t red cayenne pepper
    • ½ t black pepper
    • 1 t salt
  • 1 pound ground beef
  • 1 clove garlic
  • 1 medium onion (chopped)


Combine the ingredients for the sauce and let simmer on the stove for 2 hours (taste periodically to check levels of spice). Then, brown the ground beef, garlic, and onions. Combine with the sauce and let simmer for 30 minutes. Serve with spaghetti noodles or noodles of your choice.


Notes:

  • This recipe is a bit spicy, so temper the red cayenne pepper or use a more mild red pepper if you don’t like the heat. 
  • Grandma Wilson always used whole canned tomatoes from her garden – if you choose to use whole tomatoes, plan on needing to simmer it a bit longer. 
  • If you like thicker spaghetti, leave the sauce to simmer uncovered, but if you like thinner sauce, cover it while simmering.
  • Add some tomato sauce before the meat if you find the sauce to be too thick for your liking.

Cooking with Caroline – Summer 2022

It’s August in Minnesota,

and one of my favorite parts of summer is the farmers’ market – I love meandering down rows of colorful vegetables, fragrant herbs, and stunning bouquets of flowers while sipping my morning coffee!

Inevitably, the market often introduces me to something new; whether an herb, cheese, jam, or a new vegetable, I enjoy talking with farmers about what something is and the best way to prepare it. I encourage you to go at least one more time this year and find a vegetable or an herb you’re not familiar with. Talk to the grower and then find a recipe that looks good!

If you need an idea, might I suggest an eggplant? 

Eggplants are nutrient-dense foods that are high in antioxidants and in fiber. The most common ones are Globe/American eggplants (the big round deep purple ones) and Japanese eggplant (the longer thin dark purple ones) and this recipe is a great introduction to either of these varieties. If you’re using a Globe/American, you can either slice it in one-inch slices the long way or slice it in one-inch thick circles the short way. If you’re using a Japanese eggplant, you could slice it once in half the long way,or slice it in one-inch rounds going the short way and put the pieces in a grill pan. Regardless of how you’re cooking it (roasting or grilling), eggplants absorb lots of olive oil, so use it generously.

This recipe is for a grilled eggplant and red pepper baba ganoush – it can be used as a side dish with dinner or an appetizer dish with grilled naan bread (found in most grocery store bakery sections). If you’re serving the baba ganoush and naan bread with dinner, accompany it with a cucumber/tomato/red onion salad, some grilled chicken with Mediterranean seasoning (this one’s my favorite), and a side of feta.

Go find that eggplant, grill it up, and let me know what you think!

 Grilled Naan Bread with Grilled Baba Ganoush 

Serves 6

  • 1 large eggplant, green end trimmed, then cut into one-inch-thick slices
  • 1 large red pepper, cut in half
  • 2 tablespoons olive oil (plus more for coating vegetables)
  • 2 garlic cloves
  • ¼ cup fresh cilantro, chopped (I use ¼ cup or more, but I love cilantro)
  • 1 tablespoon lemon juice
  • 1 teaspoon ground cumin
  • Salt to taste

Start the grill at a medium heat.

To make the baba ganoush, brush the eggplant slices and red pepper with olive oil. Place the eggplant slices and the red pepper halves directly on the grill (or in a grill plan if you’re using the smaller Japanese eggplant rounds). Grill the eggplant, turning once until you have good grill marks and the eggplant is tender (8-10 minutes total). Remove the eggplant. Leave the red pepper on a bit longer (maybe 5-7 minutes), turning frequently and remove when it’s cooked through and starting to blister.

While the veggies are cooling slightly, get the naan bread ready to grill by brushing olive oil on both sides of each piece.

Add the eggplant slices and red pepper to a food processor or other Ninja-ish kitchen gadget (a blender WON’T work – you need something much higher powered), then add the 2T olive oil, cilantro, garlic, lemon juice, and cumin. Puree until smooth, then taste and add salt accordingly.

Grill the naan bread, turning once, until each piece has gentle grill marks (it won’t take long, 2-3 minutes total). To serve, cut the naan bread into wedges to dip into the baba ganoush, or leave as whole pieces to eat with chicken and salad

—P.S. This recipe is adapted from the book The Gardener and the Grill: The Bounty of the Garden Meets the Sizzle of the Grill, by Karen Alder and Judith Fertig. For anyone that loves to grill and loves to garden, it’s a must-have (buy it and try the Grilled Radicchio and Brussel Sprouts with Hot Bacon Dressing – you can thank me later).

How to Choose – A Kitchen Sink

Remodeling your kitchen? There are a lot of choices to be made – countertops, cabinets, flooring, hardware, appliances, lighting, etc.  The list goes on! You use your kitchen – and the sink – everyday, so it’s important to get the right one for you. Here’s a list of 5 types of sinks – starting with the three we install most often:

Composite

  • Made from an engineered material made up of either granite or quartz dust and acrylic resin
  • A lot of color options allowing you to easily blend your sink with your countertops
  • Durable
  • Heat resistant

Stainless Steel

  • Very common, and for good reason
  • Can be affordable
  • Durable
  • Easy to clean
  • Have a bit of “give” to them – if you are worried about dropping/breaking dishes in the sink then stainless could be a good choice
  • Can show water spots more easily
  • Only come in one color so if you want a sink that really blends in with your countertops, this may not be the sink for you.

Cast Iron

  • Made from cast iron with a layer porcelain enamel on top
  • Enameled hard top finish but can be repaired
  • Very heavy – which is not problem if we are installing for you!
  • These sinks do take a bit more effort to maintain as they can be prone to staining, but if you rinse it out after each use you shouldn’t have any problems and your investment will last for years!

Copper

  • A beautiful way to bring character into your kitchen
  • They are expensive and require a bit more maintenance
  • Come in a variety of finishes/configurations
  • Have a “living finish” – they develop a patina over time (although this can be stripped off and the sink’s finish can be sealed).

Fireclay

  • Ceramic, molded sinks
  • Fired at a very high heat to make them extremely durable

At Becker Building & Remodeling, our design-build process walks you through all these steps during your project design to help you be an educated decision-maker when it comes to the selections for your remodel.  If you’re interested in a remodel project, start the conversation with us by filling out our online form

Cooking with Caroline – Spring 2022

Welcome to the new Cooking with Caroline occasional feature on the Becker Building and Remodeling blog! To provide a bit of context, my name is Caroline – I’m Cary’s oldest daughter and Annette’s older sister. You’ve maybe seen me around as an occasional demolition hand on job sites in the summer months, but now Cary and Annette seem to think it’s a good idea to give me an occasional blog post.

Here’s the disclaimer, though: I’m not a professional chef, by any stretch. Let’s not even pretend. But, what I do know is three things: I love cooking, I love cooking for other people, and I love learning about cooking.

So, as I think about our inaugural Cooking with Caroline post, I wanted to pick a recipe that was both approachable (I don’t want you to give up on me before we even start) and flexible (I know we have picky eaters here, it’s all good). The recipe I’m sharing first is one of my favorite ways to usher in our early summer vegetable season in Minnesota – think radishes, peas, early carrots. After what seems like the interminable months of winter, I want to eat vegetables that don’t get stored in a cellar or a jar, and I want to grill on the patio without having to wear copious amounts of clothing just to feel my hands.

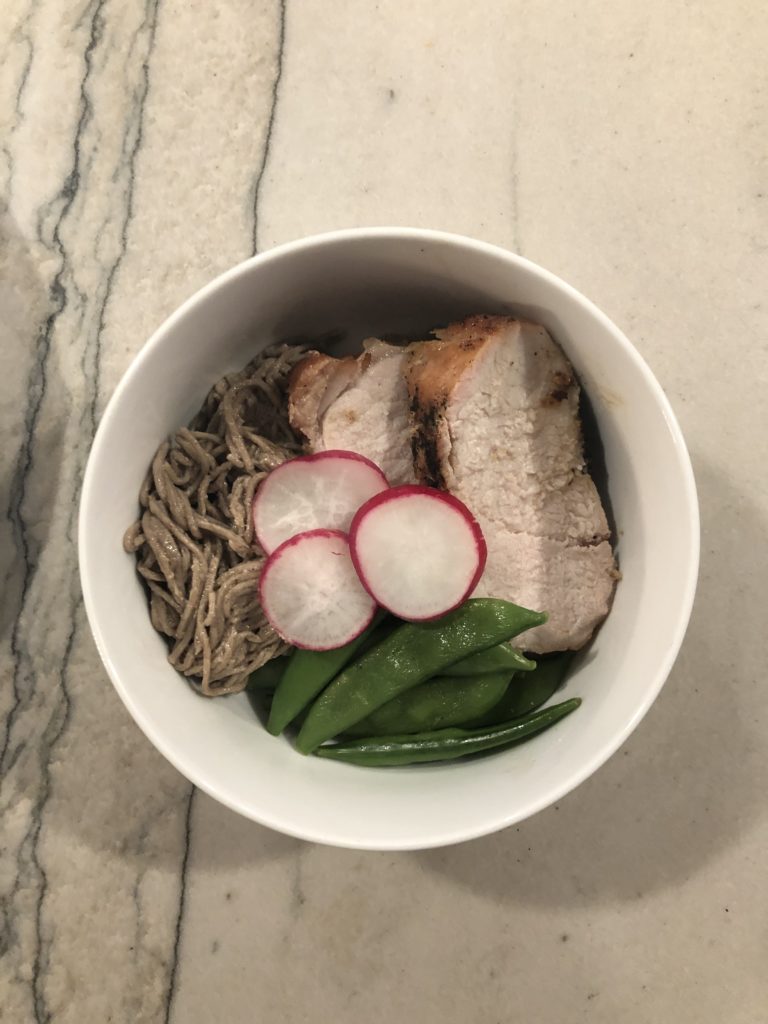
The original Soba Noodle Salad (from the April 2015 Cooking Light magazine) calls for both soba (buckwheat) noodles and steamed sugar snap peas, but I don’t particularly enjoy either of those things because they don’t cook up nicely; in my opinion, there are a few ways we can up the game. So, what I’m really sharing with you is my time-tested take-away from this recipe: a yummy pork marinade and a complimentary sauce that can be paired with most any vegetable and grain.

The original recipe calls for slicing a pork loin and marinating it for 30 minutes before grilling, but I’ve found that marinating a whole pork tenderloin overnight and slicing it after grilling makes for more tender and juicy slices. The sauce used for serving can be made in advance and will keep for a couple days in the fridge (I see you, Sunday meal prep people). 

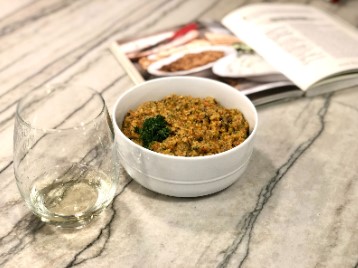
In terms of the vegetable to pair with this recipe, I’m partial to spring veggies since this marinade and sauce plays so nicely with early spring flavors – perhaps slice and steam some carrots or chop some fresh (not cooked) snap peas, then add some sliced radishes because they’re a nice crunch with the final dish. You could also add peas (cooked from frozen, or freshly shucked from the farmers’ market and steamed), cooked edamame beans, raw carrot ribbons (use your vegetable peeler), sliced red bell pepper, or steamed broccoli from the freezer – the veggies truly are flexible. In terms of the grain, if you’re not a lover of soba noodles or you’re not familiar with them, I’d recommend brown rice.

So, with that, here’s a great spring recipe! Find some spring veggies, fire up the grill and let me know what you think.

Spring Pork Marinade and Sauce

Marinade (double if using a tenderloin larger than two pounds):

  • 2T canola oil (or Olive Oil)
  • 2T maple syrup
  • 1T brown sugar
  • 5 tsp soy sauce or tamari sauce
  • 2 tsp fish sauce
  • 1 tsp grated ginger (ground ginger is fine)

Place the marinade with a 1-2lbpork tenderloin in a zip-lock bag and let sit in the fridge overnight – turn several times if possible.  

Sauce:

  • 3tsp soy sauce or tamari sauce
  • 2T sesame oil
  • 2tsp brown sugar
  • 2tsp lemon juice
  • ½ tsp crushed red pepper

Make the sauce up to one day ahead, keep in the fridge until you’re ready to serve.

Preparation Instructions:

  1. When you’re ready to cook, prepare the brown rice or other grain following the directions on the package. 
  2. The meat doesn’t take long to grill, so prepare the sauce and any vegetable prior to grilling (peeling carrots, slicing radishes, etc.) 
  3. When ready, grill the pork tenderloin on a medium hot grill for 12-15 minutes, turning once; use a meat thermometer in the thickest part of the tenderloin and cook to an internal temperature of 140-145°. 
  4. While the meat is cooking, steam or finish cooking the vegetables of your choice. 
  5. When the meat is finished, let it sit, covered in tinfoil, for a few minutes before slicing it.
  6. Serve with the rice, vegetables, and sauce.

Enjoy!

How to Clean Stainless Steel

Let’s talk about stainless steel appliances.

Stainless steel is the most common finish for appliances and looks great – especially when it is shiny and smudge free. So, we’ve compiled a list of dos and don’ts for cleaning your appliances to keep them looking new! 

Do:

  • Find the grain – Yes, your stainless steel has “grain”, similar to wood. Find the direction it runs, either horizontal or vertical, and wipe with it for a better clean and shine.
  • Use soft microfiber or cotton clothes – They won’t scratch or leave any lint behind.
  • Use water – Always try to do less first. If a damp cloth cleans up the mess, then you’re done!
  • Liquid dish soap – For more stubborn smudges, put a drop or two of dish soap on a damp cloth and wipe.
  • Try glass cleaner – Sometimes those fingerprints just won’t budge. Try spraying a bit of glass cleaner on a cloth and wiping in a circular motion.
  • Rinse and dry thoroughly – If you apply a cleaner, be sure you rinse after using and always dry your appliances with a clean cloth when you’re finished. Remember to go with the grain for the ultimate shine!

Don’t:

  • Spray cleaners directly onto your appliance – It’s hard to control how much cleaner you are using and where it lands. Instead, spray onto a cloth and then apply
  • Use abrasive brushes or scrubbing pads – They will scratch your beautiful new appliance.
  • Use harsh or abrasive cleaners – Harsh cleaners can scratch or dull the finish of your appliance, cleaners containing bleach could even stain them.

Want to see more photos of this beautiful White Bear Lake kitchen? Click here!

Feature Job – St. Paul Craftsman

St. Paul Craftsman House gets a Stylish Modern Kitchen!

After purchasing a new home in St. Paul, this young couple came to us in need of help redesigning their odd mess of stairways, doorways, and lack of access to their kitchen.  In addition to creating a stylish kitchen that pays better tribute to the rest of the beautiful woodwork in the house.  What we ended up with was a beautiful contemporary and playful space that will serve their growing family for years! 


Some BEFORE pictures:

The side window (smaller one) in the picture shown was removed so we could make room for the stove, hood, and a more functional run of cabinets.  Although it’s green out there, the window doesn’t look out onto much other than the side of the neighbors’ house.  So away it goes.

Some CONSTRUCTION plans:

A rough drawing of the changes to the doorways and floor plans.  We created a hallway from the foyer and main stairs up (coming from left), and opened up the wall between the kitchen and dining room as much as we could, considering the in-floor radiant heat throughout the house.  Mechanicals can be a tricky thing when removing or moving walls, and this old house was no exception.  Although we only altered a foot here and there with these walls, it made a huge difference in the sight lines and connectedness of the kitchen to the rest of the house. 

Some FINISHED pictures:

The result of some bravery in design details, like open shelves and a big peninsula instead of a small island, resulted in a beautiful space that makes the kitchen feel way bigger than it actually is.  Red oak accents on the hood and shelves tie in the kitchen with the woodwork in the rest of the house, and the navy cabinets and checkered floor make this kitchen look like it was original when the house was built!  Contemporary finishes on the lighting, furniture, tile work, and fixtures give this space a modern midcentury vibe that that is both functional and playful. 

 A lone POWDER BATH picture:

We’ll throw this one in for fun – a quick cosmetic update that made a major impact (although we have to admit the tile work in the powder bath is something amazing).  BEFORE picture on the left, AFTER picture on the right (you may have seen this on our Instagram from January). We still can’t get over how beautiful that wallpaper is! 

Those construction plans from above? This is the powder bath shown on the bottom right. 

How to Choose – Ceiling Texture

“What ceiling texture would you like?”

I’m sorry, there are choices? Yes! There are tons of choices. And choosing the right one is important, because it can make a difference in price, durability, and looks of your remodeled space.

Let’s narrow it down to the four simplest and most common:


Acoustical Popcorn

You’re very familiar with an acoustical popcorn ceiling.  It involves a process of mixing tiny Styrofoam balls with paint, and then blasting them onto the ceiling.  It’s quick, inexpensive, and actually does a pretty decent job in stopping sound from bouncing off the ceiling, and therefore helping with echoes.

Downsides – it doesn’t have any stain-blocking properties, so it can show pre-existing stains over time.  It’s also hard to touch up.  And, it is sharp, so it can collect dust and debris. 


Knockdown

If you’ve visited any parade homes or model homes lately, you’re probably also very familiar with a knockdown ceiling.  It too involves a spraying of types, but then using a knife to literally “knock down” the bumps. It literally looks like a knife cut through a heavy textured ceiling.  After the knocking down, it gets painted with flat ceiling white.

Downsides – although more durable than acoustical popcorn, it is still a pretty strong texture, depending on the application.  And it adds painting to the process, so it’s more expensive.

.


Smooth

Smooth is smooth.  The ceilings are treated the same way the walls are, with mud, sand, repeat.  Then it gets painted with flat ceiling white.  It’s a simple, clean, modern look.  It’s also a simple texture to use in a bathroom or small area when the rest of the house is still popcorn.  Smooth is so simple that it can compliment any other texture in the house, including popcorn.  So, if you’re remodeling your bathroom and don’t want to convert ALL the ceilings in your house, smooth is a good, durable way to go.

Downsides – it’s typically the most expensive way to go, and it shows the most.  If you have any inconsistencies in your ceiling, like most homes, you’ll see the waves and bumps.  It’s the simplest and cleanest, but also the most unforgiving in an imperfect house (which is, like, all of them). 


Orange Peel

My personal favorite for remodels, but I’m biased.  Orange peel is the silent underdog that’s got the best of all worlds.  It’s the underdog because it might seem to look a little too much like acoustical popcorn.  But, it’s not.  Similar in process to knockdown, there isn’t actually a knockdown process for this texture, but it requires a little more time and a little more finesse.  A light spraying of mud to create a subtle stipple makes it look similar to a flattened, subtle popcorn.  The stipple is so light that from afar it can look a lot like a smooth ceiling, but up close looks a little more like popcorn.  We like it because we do remodels.  If you’ve got one room that’s popcorn, and one that’s orange peel, they won’t look so insanely different like popcorn and knockdown.  And, if you have a large ceiling area and smooth won’t cut it, then orange peel will help hide the junk. It’s still durable, and still gets paint. 

Downsides – it’s the most expensive of the bunch, but not by much!  

2020 Remodeler’s Showcase – Lake Elmo

Spatial planning is important, especially in a kitchen remodel.  As are usability, flexibility, and lifestyle.  So many important factors go into the design of a space.  We pride ourselves on thinking outside the box (or the kitchen) in space planning.  And our 2020 Remodeler’s Showcase house is no exception.

When we walked in and were told a kitchen remodel was in the works, we knew there was no way we were going to accomplish a significant improvement unless we moved the kitchen.  And, there was one chair and one desk in the entire living room.  Unused space ripe for the taking. Here’s the kitchen space, and where it ended up:

Closing off the front room (south facing), which previously served as a dinette, was a scary thing considering the loss of natural light.  Solution: a wide opening with barn doors and a beautiful setup we’re all proud to showcase.  The flexible room works overtime – mudroom, reading nook, office, cleaning supplies, and hallway to the basement.

Overall, we can’t get enough of the transformation, yes, but more importantly the beautiful use of color, transitional modern rustic, and a timeless design.  The finishes include custom cabinetry in a soft gray, navy blue, engineered quartz countertops, rustic maple floors, ceramic tile backsplash, stainless appliances, composite windows, natural wood accents in maple, oak, and knotty alder, a farm sink, and black hardware and fixtures.

Interested in thinking outside the kitchen box with us?  Start your conversation today.

Hambilly Lux

Old Bathroom Before Remodel

Starting out a potential project begins by examining the current space and talking with the clients about their wants and needs. When we met with this Ham Lake family, they had a great size master bedroom, a narrow walk-in closet, an unused bedroom, and a bathroom layout that had sufficed for 20 years. They wanted to move their master closet into an empty kids’ room, and expand their bathroom into the existing master closet. We agreed, that was a fantastic idea and went to work!

Using frameless glass around three shower walls makes the space feel large and open while highlighting the ceramic tile details. We added another window near the tub area to give the tub a focal point while bringing in more natural light, and incredible scenic views. The vanity mirrors go from the backsplash to the ceiling and recessing the accent lighting into them gives the illusion of higher ceilings. The color scheme was intentional in bringing a calm, soothing, spa-like feel into this room while the floors, a rustic luxury vinyl plank, add some warmth to the palette.

Overall, this was such a fun project for us to get creative with layout and finishes. We sharpened our skills in working within the confines of plumbing access and found creative solutions to give the this couple their dream master suite that has a WOW factor.